Navigation menu

Saturday, 31 May 2014

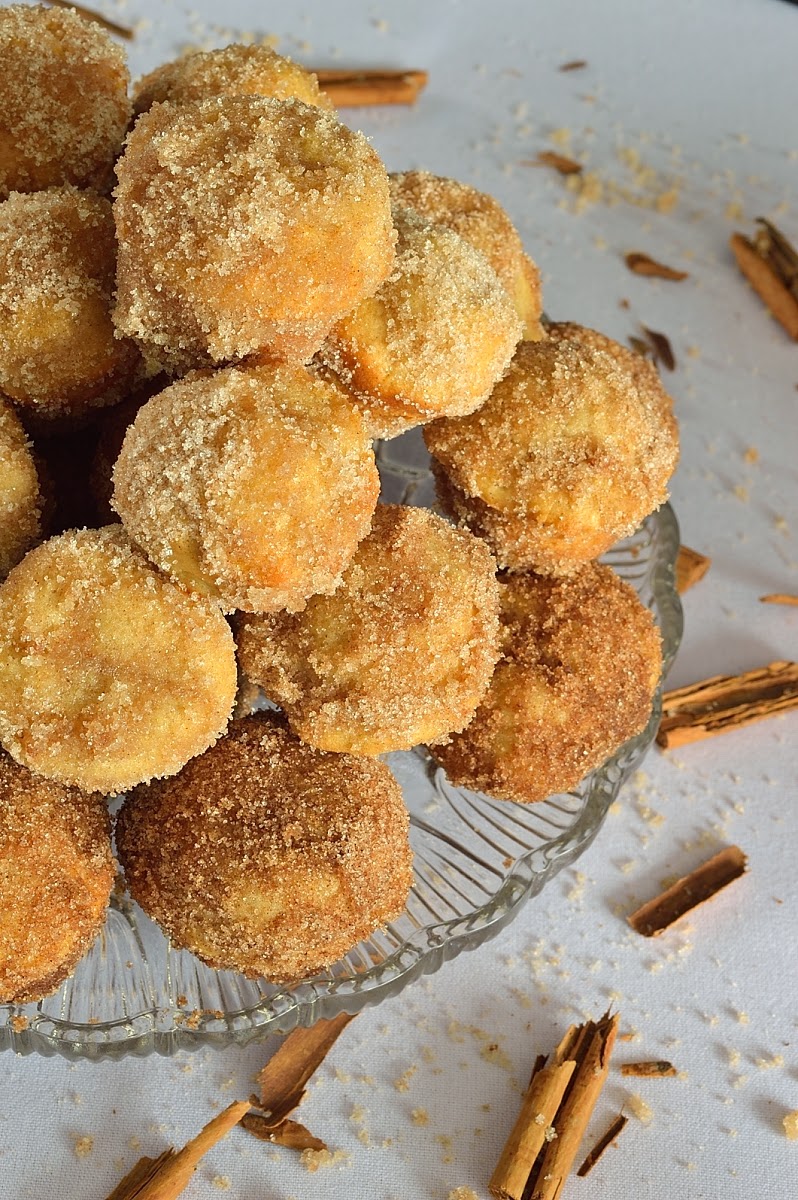
Cinnamon Sugar Mini Muffin Doughnuts

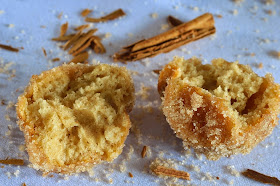
I baked these as I had some Greek style yoghurt that needed using up and they were the perfect pick me up for a Saturday afternoon. They would be a delicious brunch treat too.  A word of warning, these Cinnamon Sugar Mini Muffin Doughnuts are addictive and moreish.  Being so small and dainty it is very easy to eat more of them than would be considered sensible or polite.  Luckily this recipe makes 60 of them, it seems a lot but trust me, they will disappear in record time!


Cinnamon Sugar Mini Muffin Doughnuts

450g plain flour
210g sugar
2 tsp baking powder
1 tsp bicarbonate of soda
1 tsp ground cinnamon
280g Greek style yoghurt
3 large free range eggs
115g butter, melted and cooled

Coating:
Melted butter
Cinnamon sugar

Preheat your oven to 180C/160C Fan and grease two 24 hole mini muffin tins.

Mix all the dry ingredients together in a large bowl and make a well in the center.  In another bowl or large jug mix the yoghurt, eggs and melted butter together.  Pour the wet ingredients into the dry ingredients and gently but thoroughly mix until combined, do not beat the mixture or your doughnuts will be tough.

Fill each off the holes in the muffin tins until level with the top of the tin. Bake in the preheated oven for 10 - 15 minutes until golden and a skewer inserted into the center of a muffin comes out clean.

Cool in the tin for a couple of minutes before turning out onto a wire rack.  Once the mini muffin doughnuts are cool enough to handle but still fairly warm, dip in melted butter then into cinnamon sugar.  Serve warm or cold.


I'm adding these delicious morsels to Alphabakes June Challenge, created and hosted alternately by  The More than Occasional Baker and Caroline Makes, because the letter is month is D.


Cheese and Vegetable Puffs - Extra Veg June 2014

I am hosting Extra Veg again this month which is a blogging challenge created by myself and Helen from Fuss Free Flavours as a way to encourage us all to incorporate more vegetables into our meals.  Many thanks to Shaheen for hosting last month, visit her blog to see the round-up.

I made these delicious morsels to fill hungry tums during Half Term.  They made a tasty lunch accompanied by a green salad topped with herbed natural yoghurt, tomatoes and cucumber slices.  Prefect for cooking with kids, each can grate a vegetable or the cheese and take turns mixing and dolloping the mixture on trays before baking.


Cheese and Vegetable Puffs

125ml milk 
1 free range egg
1 courgette, grated
1 carrot, grated
2 spring onions, finely chopped or use or 2 Tblsp finely chopped fresh chives
1 pepper, finely chopped (any colour will do)
150g cheddar cheese, grated
150g self raising flour

Preheat the oven to 190C/170C Fan. Line two baking trays with non-stick baking paper.

In a large bowl, whisk together the milk and egg. Add the courgette, carrot, spring onions/chives pepper and cheese.

Sift over the flour. Mix well until a thick mixture forms.  Spoon out portions onto the prepared oven trays.  Bake for 20-25 minutes until golden brown and cooked through.

These Cheese and Vegetable Puffs keep well for a couple of days when stored in an airtight container in the fridge.  They also freeze well. 


So now it's your turn, I can't wait to see all the delicious entries you come up with this month!  To take part, simply blog about any recipe or idea where you eat an extra portion of vegetables.

There are a few rules:

Please use the logo above and link to the current host (ME!) and to Helen.

Tweet using #ExtraVeg and tag @utterlyscrummy and @fussfreehelen so we can retweet your entries

Closing date – 28th of the month

By entering you are agreeing to let us use an image from your entry on this site, and to pin to Pinterest.

Please be respectful of other people’s copyright

Feel free to send to send you blog post to as many other events as you like

Tell me about your ideas for extra veg by adding your URL to the linky below!

We’ll be looking for guest hosts later in the year, so please mail Helen if you are interested. helen at fussfreeflavours dot com


Friday, 30 May 2014

Fruit Bowl Cake - No Waste Food Challenge June 2014


I am delighted to be hosting the No Waste Food Challenge this month on behalf of Elizabeth's Kitchen.  I cannot stand food waste and we ensure we use the food we buy wisely and waste as little as possible.  The theme is open, sweet or savoury recipes, share any recipe which uses up any ingredients which otherwise might have gone to waste.

I decided to bake a cake using fruit that was slightly past it's best in our fruit bowl.  There were a couple of apples, a couple of pears which were still rock hard even after a week in the fruit bowl, and a 150g pack of reduced for quick sale blueberries which I purchased for 20p.

I used my usual sponge recipe but substituted oil for butter as it makes it much easier to mix, and we'd run out of butter.  The recipe is really versatile, you could use ground ginger instead of cinnamon,  or leave out the spice and use vanilla extract.  I use whatever fruit I have that needs using up, I haven't tried sliced banana yet but most firm fruit works such as apples, pears peaches, nectarines, apricots and plums providing they aren't too mushy.


Fruit Bowl Cake

If you are using apples or pears which are likely to go brown once peeled and sliced, toss them in the juice of a lemon then prepare the cake batter. 

500g of prepared fruit (plums, apples, pears and berries all work well)
Juice of 1 lemon (optional)
1 tsp ground cinnamon
200g self raising flour
200g caster sugar
3 free range eggs
100ml oil

Heat oven to 180C/160C Fan.  Grease and line a 23cm round cake tin.

Core and dice the fruit then set aside.  Peel apples and pears if you want, I didn't bother.  Toss the prepared fruit in the juice of a lemon if it is likely to turn brown.  Combine the cinnamon, flour and sugar in a large bowl.  Make a well in the centre and add the eggs and oil.  Beat until a smooth mixture forms.  

Fold through the fruit, and any remaining lemon juice, then pour the batter into your prepared tin and level the top.  Bake for 45 to 50 minutes or until a skewer inserted into the centre of the cake comes out clean.


Now it's your turn. I can't wait to see all the leftover loving, food saving, delicious recipes you come up with!

Challenge Conditions:

Please make sure your post includes a link back to this blog post and Elizabeth's Kitchen then link up your URL using the linky at the bottom of this post.

Feel free to republish old posts, just make sure you add a link to the current challenge and add the challenge badge (the blue badge at the top of this post).

Make sure you link up before the 28th of the month.

Posts will be added to the No Waste Food Challenge Pinterest Board to help spread the food waste prevention love.

Tweet @utterlyscrummy and @TangoRaindrop with the hashtag #NoWasteFoodChallenge and we will retweet all that we see.


Tuesday, 27 May 2014

Marble Cupcakes

My 14yo loves to bake and decided to bake some of these delicious treats for our morning tea over the Bank Holiday Weekend.  She also took the photos in this post, clearly she is a food blogger in the making!


Marbled Cupcakes

250g butter, softened
250g caster sugar
1 dollop vanilla bean paste or 1 tsp vanilla extract
3 free range eggs, beaten
250g flour
1 tsp baking powder
4 Tblsp cocoa powder

Preheat your oven to 190C/170C Fan. Line a 12 hole muffin tin with paper liners.

Beat the butter and sugar together until pale and fluffy, I used a hand held electric beater.  Keep beating the mixture and add the beaten egg a little at a time. If the mixture looks like it is starting to curdle add a tablespoon or two of flour. Once the egg has been incorporated, gently fold in the flour and baking powder. Divide the mixture evenly between two bowls. Add the cocoa powder to the one bowl and fold in until completely combined. 

Spoon dollops of each of the mixtures into each muffin case then gently swirl a skewer through the mixture to create a marbled effect.  Gently level the top of each cupcake.

Bake in the preheated oven for 20 - 25 minutes or until a skewer inserted in to the centre of a cupcake comes out clean. Cool in the tin for a few minutes before transferring to a wire rack to cool completely.


Monday, 26 May 2014

Cheese and Herb Bread Sticks


It is Half Term holidays for my cherubs this week which means a seemingly endless quest to keep them from eating us out of house and home.  I whipped up these for an afternoon snack, with the help of all 3 of my girls.  These bread sticks would be great as a party snack for kids parties or a snack with drinks for a more grown up gathering.

It is a great recipe for kids to help with as there's measuring, kneading, grating and snipping of herbs to be done as well as cutting the sticks from the dough.  These bread sticks keep well in an airtight container, assuming they are not all eaten in one afternoon.


Cheese and Herb Bread Sticks

250g strong white bread flour, or use half wholemeal and half white
1 sachet instant yeast
1 tsp salt
15ml/1 Tblsp oil
150ml lukewarm water
100g mature cheddar, finely grated
1 or 2 Tblsp fresh chives, finely chopped or 1 - 2 tsp dried mixed herbs

In a large bowl, or in the bowl of a stand mixer, measure the flour, yeast, salt and oil. Gradually add the water whilst slowly mixing and continue to mix until a dough forms. Either knead in a mixer or turn out on to a lightly floured surface and knead until the dough is smooth and elastic, this usually takes about 10 minutes by hand. Put the dough into a lightly oiled bowl, cover with clingfilm and leave to prove until doubled in size. This took about an hour in a warm kitchen. 

Line a couple of oven trays with non-stick baking paper and preheat your oven to 200C/180C Fan. Once the dough has proved, knock it back and knead through 3/4 of the finely grated cheese and all of the fresh or dried herbs. Roll out the dough on a floured surface to form a rectangle about 1cm (½ inch) thick. If you have a pizza wheel this makes the task of cutting the strips of dough much easier. If you don't then don't worry a floured sharp knife works just as well. Cut the dough into strips 1cm (½ inch) wide and put the dough strips on to your prepared trays allowing a little room for the bread sticks to spread. Sprinkle the leftover quantity of the grated cheese over the top of the cheese sticks.

Bake in your preheated oven for about 12 - 15 minutes until crisp. Keep an eye on them towards the end of the cooking time. Different thickness bread sticks may need a longer or shorter cooking time. I sometimes turn the bread sticks over and bake them for another couple of minutes to make sure they are crispy and cooked through. Once cooked, transfer the bread sticks to a wire rack to cool completely. Store in an airtight container. 


Saturday, 24 May 2014

Banana Brunch Swirls


I baked these as an experiment and treat on a rainy Saturday morning.  We had a couple of very over-ripe bananas to use up and my family wanted me to bake fruit buns so I thought why not combine the two.

These buns are dairy-free, egg-free and vegan so are perfect for those with special dietary needs.  The dough is soft and best kneaded in a mixer, although you could make it by hand if you really wanted to.  I only just managed to keep my husband and children away from them long enough for me to take photos.


Banana Brunch Swirls

175g brown bread flour
100g white bread flour
5g instant yeast
1/2 tsp salt
1 over-ripe banana, mashed
125ml lukewarm water
2 Tblsp oil

Filling:
1 over-ripe banana, mashed
100g dried fruit, I used dates and raisins
50g light soft brown sugar

Put all the dough ingredients into the bowl of a stand mixer.  Mix until a smooth dough forms then knead for 10 minutes.  Cover and set aside to prove until doubled in size, this took just over an hour in a warm kitchen.

Grease and line a 20cm square cake tin with non-stick baking paper.

Once the dough has proved, knock it back and roll out on a floured surface until you have a rectangle measuring approximately 30cm x 25cm.  Mix together the filling ingredients and spread over the dough.  Roll up the dough from the longest side and pinch to seal.  Divide the roll into 8 pieces and put into the prepared cake tin.  Cover and leave to prove for 30 - 45 minutes.

Preheat your oven to 200C/180C Fan.  Uncover the proved buns, sprinkle with a little fine raw cane sugar if you wish then bake the buns for 20 - 25 minutes until cooked though and golden.  Cool in the tin for 10 minutes before carefully turning out onto a wire rack to cool completely.


Thursday, 22 May 2014

Chocolate Hedgehog Slice - Two Ways

There are no hedgehogs in this slice, nor were any harmed it the making of it.  I was asked by a friend on Facebook if I would blog a recipe for this deliciously easy no bake slice so I whipped up a couple of batches.  I remember making variations on these slices as a child with my Mum and Nan.  They are great for cake stalls and last minute 'bring a plate' functions.


Some recipes use egg, some don't, both of mine don't as I prefer making these slices without using egg.  One recipe uses condensed milk and the other just melted chocolate, butter and golden syrup. The slices are very versatile, you can add coconut, dried fruit or vary the biscuits used.  If you use glace cherries be sure to give them a good rinse to get the sugary syrup off and make sure they are dry before you mix them into the slice.  

Chocolate Hedgehog Slice - Version 1

100g butter
100g plain/dark chocolate
395g condensed milk
30g cocoa powder
a dollop of vanilla bean paste or 1 tsp vanilla extract
250g plain biscuits (rich tea or shortbread work well)

Melt the butter, chocolate and condensed milk together in a saucepan over a low heat until a smooth mixture forms.  Remove from the heat and stir in the cocoa powder and vanilla until completely combined.  Put the biscuits in a bag or bowl and crush with a rolling pin so you end up with some larger pieces and some crumbs.

Pour the chocolate mixture into the crushed biscuits and stir until evenly coated.  Tip the mixture into a lined Swiss Roll tin, press into an even layer and level the surface.  Put in the fridge for 1 to 2 hours or until set.

Should you wish to ice the slice, melt 200g plain chocolate and 50g butter over a low heat for a few minutes until melted and combined.  Spread this mixture over the cold slice and smooth the top.  Put back into the fridge until the icing has set.


Chocolate Hedgehog Slice - Version 2

250g plain/dark chocolate
125g butter
60ml/4 Tblsp golden syrup
200g shortbread or other plain biscuits crushed into pieces
120g raisins

Put the dark chocolate, butter and golden syrup into a saucepan over a low heat.  Melt together, stirring often, until a smooth mixture forms.  Stir in the biscuits and raisins then tip into a Swiss Roll tin lined with baking paper.  Put in the fridge until set.  

Should you want to add even more chocolate once the slice has set, melt 150g milk chocolate, pour over the cold slice then return to the fridge until the topping has set.  Cut into serving sized pieces. Store in an airtight container in the fridge.


Wednesday, 21 May 2014

Blackberry Flapjacks

My daughters are very fond of flapjacks and I normally add dried fruit or chopped fresh apple to add more flavour.  I decided to use some over-ripe blackberries I rescued from the supermarket bargain bin, costing only 50p, and put a layer of fruit in the middle of the flapjacks.  They were a huge hit and I have made them a few times since, sometimes using a layer of jam or fruit compote in place of squished fresh berries.

Blackberry Flapjacks

100g butter
100g light soft brown or caster sugar
100g golden syrup
225g rolled oats
25g ground almonds
300g fresh blackberries

Grease and line a 20cm square cake tin. Preheat your oven to 180C/160C Fan.
Put the butter, sugar and golden syrup into a large saucepan over a low heat. Cook gently, stirring occasionally, until the butter and sugar are melted. Remove from the heat and pour the dry ingredients into the saucepan. Mix well until all the ingredients are coated with the syrup mixture.

Tip 2/3 of the mixture into the prepared cake tin and press down with a potato masher to form an even layer. Mash the blackberries in a bowl until pulpy and tip this over the mixture in the cake tin. Sprinkle the remaining oats mixture over the fruit layer and gently press down to level the top.

Bake at 180C/160C Fan for 15 - 20 minutes, then leave to cool completely in the tin before cutting into squares.


Sunday, 18 May 2014

Throwing the perfect baby shower

As regular readers will know I am unexpectedly expecting our fourth child.  I've only ever had one Baby Shower thrown for me and that was when I was pregnant with our eldest child.  I have however planned and thrown lots of baby showers for friends and thought I would share some hints and tips to help those planning a Baby Shower for a friend or relative.

Here are my top tips:

Good planning is essential - Decide on the theme and type of party you will be organising.  Pinterest has endless ideas for themes, games, food, etc.  Send out invitations at least 14 days in advance and don't invite more guests than you or the venue can cope with. Also ask guests to notify you of any dietary requirements when they RSVP. Consider asking guests to bring a plate of savoury or sweet treats if you are not the most confident cook or on a tight budget. If guests aren't able to bring a plate of food they could bring some refreshments instead. Make sure you have enough crockery, cutlery and seating for all the invited guests 

Time management - Do as much preparation ahead of time as possible.  Make or buy decorations, ensure you have a timetable for the day to ensure food stays fresh and savoury items can be served warm if necessary. Savouries that you can make in advance and freeze are fab as all you need to do on the day is defrost them and heat them up. Cupcakes can also be frozen uniced ready to be defrosted and decorated on the day. Leave yourself plenty of time to decorate the venue and set up the refreshment tables, a few willing helpers will come in very handy at this point.

The menu - Ensure dietary needs of guests are catered for with gluten free, egg free and vegetarian options available if necessary. I like to serve bite sized sweet and savoury treats which are easy to eat whilst chatting. I usually try and have enough savoury and sweet treats that allow for each person to have 4 or 5 savoury and 3 or 4 sweet items. Tailor the food to your event, whether it be dainty cakes and treats for an afternoon tea or canapes for more of a sophisticated evening party event. Also make sure there are plenty of refreshments such as fruit juice, tea, coffee, mocktails/cocktails and wine if you want.

Gifts - A Wish List is a great way to ensure the Mum-to-be doesn't end up with 31 sleepsuits.  An online document that guests can edit can be a great way to ensure that gifts are what the guest of honour wants/needs.  Ensure the list contains items to suit all budgets, also make sure homemade items, especially toys, are safe for very young babies.  I am coveting a stylish change bag from Pink Lining, amongst other things, just in case anyone wants to get me one ;o)

I asked friends on Facebook for their Baby Shower tips:

Maria said "Make sure people know you would like a baby shower, hoping they will throw you one is not enough. Apparently some people need telling a whole lot of times."

Hannah had a brilliant idea "If people are bringing children make sure there is a little table of activities for them to keep them amused. This is what my friend did at mine, the children decorated little biscuits and had baby colouring sheets.*

Jo suggested "Have lots of cake there and wine for the non-pregnant ladies! Silly games are always a hit too! We had to drink squash out of baby bottles at mine"

And my cousin Catherine had a great idea for a keepsake "A friend threw both my baby showers for the girls. We had civilised afternoon teas! One thing she did do, and I still have, is she got a plain fleece blanket and then cut squares of fabric (with animals on them) had every one sew one on throughout the day and then sign their name. Its still in use 11 years later I love it and my daughter treasures it so much."

Here are my top two recipes for easy and tasty party savouries that can be made in advance:

Mini Vegetarian Quiches

1 sheet ready-rolled short crust pastry
2 large free range eggs
60ml milk
a few grinds of black pepper
1 courgette, finely diced
1 pepper, finely diced
finely chopped fresh chives
75g grated mature cheddar

Preheat your oven to 180C/160C Fan. Grease a mini muffin tin.

Cut small circles from the pastry using a cookie cutter or the rim of a glass, then line 15-holes of a mini muffin tray with the pastry circles, pressing in to conform to the tin. Chill the tray whilst you make the filling.

In a jug, beat the eggs and milk until smooth, then stir in the freshly ground pepper.  Put some finely diced courgette and pepper into each pastry case. Sprinkle over some chopped fresh chives. 

Fill each of the pastry cases with the egg mixture. Sprinkle over some cheese then bake for 15 - 20 minutes until the pastry is golden and the filling is puffed up and cooked through. Serve immediately or cool and freeze for later if you like.


Mini Pizza Tartlets

375g pack ready rolled puff pastry, thawed if frozen
2 or 3 Tblsp tomato paste
1 courgette, finely diced
1 pepper, finely diced
finely chopped fresh chives
100g mature cheddar, grated

Preheat your oven to 200C/180C Fan. Line two oven trays with non-stick baking paper. Cut small squares from the pastry then score a border about 1/2 cm in from the edge. I made 24 savouries from one sheet of pastry.  Prick inside the border with a fork. Spread tomato paste inside the border of each square, top with a little diced courgette and pepper followed by a sprinkling of chives and grated cheese. Bake in the oven for 15 minutes or until pastry is golden and topping is cooked through.


Disclosure: I was compensated for my time spent writing this post and creating the recipes

Thursday, 15 May 2014

Eggless Chocolate Slice

This is a family favourite and it keeps well in an airtight tin, not that it usually lasts too long in our household.  My Nan used to bake this when she knew visitors were on their way and it has long been a staple recipe for for those of us in our clan who bake.

My children nagged relentlessly asked if I would bake a batch so they could have a small slice each after school this week.  I agreed as my two youngest have exams this week and a little treat after school, along with some fruit and yoghurt, should hopefully keep them going whilst playing outside for a couple of hours before dinner.


Eggless Chocolate Slice

250g butter
200g sugar
30g cocoa powder
1 Tblsp golden syrup
300g self raising flour
65g desiccated coconut

Chocolate Icing
300g icing sugar
2 Tblsp cocoa powder
1 or 2 Tblsp water, approximately
  
Grease and line a 20cm x 30cm Swiss Roll Tin.  Preheat your oven to 180C/160C Fan.

Place a large saucepan over a low heat.  Melt together the butter, sugar, cocoa and golden syrup.  Don't let the mixture boil.  Leave the mixture to cool to room temperature before adding the flour and coconut.  Mix until completely combined.

Press the mixture into your prepared cake tin.  Bake for 20 minutes.  Take the slice out of the oven and leave to cool in the tin for 15 minutes.  Pour over chocolate icing and leave to cool completely.  Once cool, cut into slices and store in an airtight container.


Wednesday, 14 May 2014

Mini Cream Buns

I baked these treats for an afternoon tea with friends.  The buns themselves aren't sweet or loaded with sugar, however there is a sweet glaze, and you can fill them with jam or fruit curd and cream before serving.

This recipe made 20 Mini Cream Buns which was an ideal amount to serve 10 people for afternoon tea along with other treats.  They are quick to make and relatively low faff with the dough needing only a couple of short proving times.


Mini Cream Buns

450g plain flour
1/2 tsp salt
2 tsp caster sugar
7g sachet of instant yeast
300ml lukewarm milk
60g butter, melted

Glaze
125g caster sugar
75ml milk

Grease and line two large oven trays.  Put the flour, salt, sugar, and yeast into a large mixing bowl or the bowl of a stand mixer.  Add the milk and melted butter and mix until a soft dough forms.

Knead the dough in a mixer or on a lightly floured surface until smooth and elastic, this usually takes between 7 - 10 minutes.  Put the dough into a lightly oiled bowl, cover with greased cling film and leave until doubled in size, this took about 30 minutes in a warm kitchen.

Preheat your oven to 200C/180C Fan.  Turn out the risen dough, knead it a little to knock it back and divide into 20 equal portions, mine weighed 40g each.  Roll each portion of dough into a smooth ball and place on the prepared baking trays.  Cover with greased cling film and leave to prove again for 15 minutes.

Uncover the buns and bake for 15 - 20 minutes until golden brown.  Make the glaze by combining the sugar and milk over a low heat until the sugar dissolves.  Brush the glaze over the still warm buns and leave to cool.

Once cool, make a cut in the buns and fill with cream and jam or fruit curd.


Monday, 12 May 2014

Our Family Meal Plan for this week - 12/05/14 - £52

I've written another hastily compiled Meal Plan this week.  I have had really bad morning sickness this week which has left me exhausted and less than enthused about food.  I was fortunate to pick up a free range chicken in the discounted/clearance section of the supermarket so we shall make the most of that and stretch it out for 3 meals.  I have included the cost of the chicken at full price to help those following the meal plan.

Breakfasts will either be cereal or toast with spread and a piece of fruit for afters.

My daughters are back on packed lunches, much to their delight.  They've made some Wholemeal Savoury Swirls for their lunch boxes and will have them with crudites, a piece of fruit and a small baked treat.  My husband and I will have leftovers from the previous night for our lunches.

Weekend Lunches will be Twice Baked Potatoes and a French Onion Soup with homemade bread rolls.

Dinners

Monday - Roast Chicken with Roast Vegetables, Steamed Greens and Yorkshire Puddings.

Tuesday - Chicken and Vegetable Fried Rice


Friday - Homemade Pizzas


Sunday - Vegetable Pie


Shopping List

27 items: £52.33

Frozen
1x   ASDA Chosen by You Oriental Vegetables Stir Fry (500g)              £1.25
2x   ASDA Smartprice Mixed Vegetables (1Kg)                                     £1.50
1x   ASDA Chosen by You Cook from Frozen Salmon Fillets (400g)       £3.00

Dairy and Eggs
4x   ASDA British Semi Skimmed Milk 4 Pints (2.27L)                           £4.00
1x   ASDA Smartprice Salted Butter (250g)                                           98p
2x   ASDA Chosen by You Mature British Cheddar (450g)                     £5.00 any 2 FOR £5.00

Packets and Cereals
1x   Allinson Strong White Bread Flour (1.5Kg)                                     £1.00
1x   ASDA Smartprice Plain White Flour (1.5Kg)                                   45p
1x   ASDA Home Baking Easy Bake Yeast (6 per pack - 42g)               65p
1x   ASDA Wholefoods Brown Bread Flour (1.5Kg)                                £1.28
2x   Jordans Truly Fruity Muesli (750g)                                                £4.00 was £3.38

Fruit and Vegetables
12   ASDA Bananas by Weight (170g)                                                  £3.00 12 FOR £3.00
10   ASDA Carrots by Weight (110g)                                                    82.5p
2     ASDA Leeks by Weight (250g)                                                      80p was 49.3p
2x   ASDA White Potatoes (2.5Kg)                                                       £3.00 any 2 FOR £3.00
1     ASDA Butternut Squash by Weight (850g)                                     80.8p
3x   ASDA Whole Cucumber                                                                £1.50
2x   ASDA Celery                                                                                £1.60
1x   ASDA Garlic Loose                                                                       30p
1x   ASDA Smartprice Peppers (700g)                                                  £1.36
1x   ASDA Courgettes (3)                                                                    £1.00
1x   ASDA Smartprice Brown Onions (2Kg)                                          98p
1x   ASDA Sweet Potatoes (1Kg)                                                         £1.00
4x   ASDA Smartprice Pears (500g)                                                     £3.16
4x   ASDA Smartprice Apples (500g)                                                    £3.60

Tins, Jars and Cooking
1x   ASDA Tomato Puree Double Concentrate (310g)                            72p

Meat, Fish and Poultry
1     ASDA Extra Special British Free Range Corn Fed Whole Chicken by Weight (1.4Kg)       £5.57 was £6.97

Don't forget to check out the other Meal Plans over on
 At Home With Mrs M


Sunday, 11 May 2014

Quick and Easy Lemon Yoghurt Cake

Sometimes you just fancy a slice of cake.  This cake is so quick to mix and get in the oven which means you and yours will soon be devouring freshly baked deliciousness.  Best of all this cake is large, 23cm/9 inches round, so there is plenty to share with friends and family. 

I've been baking this cake for years, it is so easy to make that my older two children can bake it by themselves.  We always tend to have lemons and yoghurt in the house.  Should you feel the need for cake give this one a whirl!


Quick and Easy Lemon Yoghurt Cake

350g caster sugar
zest of 2 lemons
2 large free range eggs
250ml oil, I used vegetable oil
300g natural yoghurt, I used Greek Style
50ml freshly squeezed lemon juice
300g self raising flour

Preheat oven to 180C/160C Fan.  Grease and line a 23cm round cake tin.

Place the sugar, zest, eggs, oil, yoghurt and lemon juice into a large bowl.  Mix with an electric beater until thoroughly combined.  Measure in the flour and fold through gently until just combined.  
Pour the cake batter into your prepared tin and bake for 50 - 60 minutes or until a skewer inserted into the middle of the cake comes out clean.  Remove from the oven and leave the cake in the tin to cool.  Remove the cake from the tin once cool and dust with icing sugar or spread with icing before serving.


Tuesday, 6 May 2014

Egg-free, Dairy-free Wholemeal Banana and Date Muffins

I baked these muffins as we had some over-ripe bananas which needed using up.  I wanted to bake muffins which used wholemeal flour and weren't loaded with sugar.  I added dates for natural sweetness and a little honey.  The sweetness from the over-ripe bananas meant that the muffins didn't need extra refined sugar added to the mixture.  You could make these muffins vegan by substituting the honey for another sweetener or leaving it out altogether.

These muffins would be delicious as part of a breakfast on the go, a treat in lunch boxes or as an after school snack.


Egg-free, Dairy Free Wholemeal Banana and Date Muffins

2 medium sized over-ripe bananas
1/2 tsp vanilla extract
2 Tblsp honey or maple syrup
2 Tblsp vegetable oil
150g wholemeal flour
1 1/2 tsp baking powder
1/2 tsp bicarbonate of soda
1 tsp ground cinnamon
2 handfuls of finely chopped dates

Preheat your oven to 180C/160C Fan.

Line a 10 holes of a 12 hole muffin tin with paper liners.   

In a bowl, mash the bananas to a pulp then mix with the vanilla, honey and oil until well combined.  Measure the dry ingredients and dates in a separate bowl, stir to combine.  Add the wet ingredients to the dry ingredients and fold together until completely incorporated but don't beat the mixture.  

Spoon the mixture evenly into your lined muffin tin.  Sprinkle over some oats if you wish.  Bake for 20 minutes or until a skewer inserted into the centre comes out clean.  Cool the muffins in the tin for 5 - 10 minutes before transferring to a wire rack to cool completely.


Monday, 5 May 2014

Rich Chocolate Cake for Yogurt Week

Monday 19th May marks the start of Yogurt Week – a celebration of all things yogurt! Whether it’s for breakfast on the go, a delicious snack or for use in your favourite recipes, yogurt contains a range of nutrients important for a balanced diet and healthy lifestyle, and is a great food staple for all the family to enjoy. With so many ways to enjoy yogurt, the Yogurt Council has launched the first dedicated Yogurt Week and asked me to come up with a sweet treat using yoghurt. For more information check out @loveyoghurtUK on Twitter, the Yogurt Week website or Love Yoghurt UK on Facebook.

Using yoghurt in cakes makes them moist and gives a richness of flavour.  We always have yogurt in the fridge, whether it be homemade or store bought, as most families do.  If you have some yogurt in your fridge do give this cake a try, it is so easy to whip up you don't even need a mixer.


Rich Chocolate Cake

185g self raising flour
50g cocoa powder
1 tsp bicarbonate of soda
185g caster sugar
250ml Greek style yogurt
125ml vegetable oil
1 large free range egg
1 tsp vanilla extract or vanilla bean paste

Grease and line a 20cm/8 inch square cake tin.  Preheat your oven to 180C/160C Fan.

Combine the dry ingredients in a large bowl.  Mix the yogurt, oil, egg and vanilla until well combined in a separate bowl or jug.  Add the wet ingredients to the dry and gently fold together until completely mixed, do not beat the mixture.  Pour into your prepared cake tin and bake for 30-35 minutes or until a skewer inserted into the centre comes out clean.  Cool in the tin for 10 - 15 minutes before transferring to a wire rack to cool completely.  

Chocolate Yogurt Ganache

200g dark chocolate
125ml Greek style yogurt

Take the yoghurt out of the fridge and allow to warm to room temperature whilst you melt the chocolate.  Melt the chocolate in a bowl set over a saucepan of simmering water.  Once melted, set aside the chocolate to cool slightly then stir through the yogurt until completely combined.  Leave to stand until ganache thickens.  Spread over the cake.


Do take a look at some more delicious Yogurt Week recipes created by other bloggers:

Thai Spice Yogurt Marinated Pork by Katie

Greek-style Baked Tomatoes Peppers Onions and Chilli by Jan

White Loaf made with Yogurt by Helen


Disclosure: I was compensated for my time and expertise creating this recipe for Yogurt Week

Our Meal Plan for this week - Salads and BBQs

Our usual Meal Plan complete with shopping list will return next week.  I'm very much in need of a rest this week and as the weather is warming up slightly I decided that we would have a low faff, salad based Meal Plan  We have lots of fresh salad greens from our allotment which will supplement the other salads.  All the salads will be served with either grilled fish, falafels, grilled lean meats or grilled haloumi cheese.

Breakfasts will be really simple, either cereal with milk or toast and spread, with fruit for afters. As my 3 daughters will be having school dinners, lunches for my husband and I will be leftovers from dinner the previous night. 

Dinners


Salmon Bake

1/2 cup plain flour
1/4 teaspoon baking powder
4 free range eggs, beaten
500ml milk
100g butter, melted
415g can pink salmon, drained 
1 onion, finely chopped
70g grated cheddar cheese
1 tsp fresh chives, finely chopped

Sift the flour and baking powder into a large bowl. Make a well in the centre, pour in the eggs, milk and butter. Then add the drained salmon, finely diced onion, grated cheese and chives. Mix everything together until just combined. Don’t over-mix it.

Grease a large ovenproof dish then pour the mixture in. Cook at 180ÂșC for about 45 minutes until the egg has set. I’ll be serving this with a green salad and chopped tomatoes.


Couscous Tabouleh

300g couscous 
Boiling water/vegetable stock
2 Tblsp olive oil 
1 small clove garlic, crushed 
4 tomatoes, roughly chopped 
1 yellow or orange pepper, deseeded and diced
1 handful fresh mint, chopped
1 handful fresh flat leaf parsley, chopped 
3 spring onions, thinly sliced 
2 Tblsp freshly squeezed lemon juice 
salt and pepper to taste

Put the couscous into a heatproof bowl and pour in enough boiling water or stock to cover the couscous. Cover the bowl with clingfilm wrap and set it aside for 5 minutes. 

After 5 minutes uncover the couscous, add the oil and garlic, then fluff it up with a fork. Leave the couscous to cool for 10 minutes then add the tomato, mint, parsley, spring onion, lemon juice, salt and pepper. Serve immediately or put in the fridge until you’re ready to serve it.


Carrot Salad

5 large carrots, peeled and grated
1 red onion, thinly sliced
2 Tblsp sultanas or raisins
Small handful chopped fresh flat-leaf parsley


Dressing:
6 Tblsp lemon juice
1 Tblsp tablespoon olive oil
1 tsp honey or sugar
1 tsp ground cumin
1 tsp ground coriander

Put all the salad ingredients in a bowl and mix them together. Put all the dressing ingredients into a screw top jar. Shake to combine and then pour over the salad just before you serve it.


Roast Vegetable Salad

400g butternut squash, peeled and cut in 1 inch dice
500g sweet potatoes, peeled and cut in to 1 inch dice
1 pepper, deseeded and cut into 1 inch strips
2 red onions, cut into 8ths 
1 Tblsp olive oil
salt and pepper, to taste
350g spinach
420g can chickpeas, drained and rinsed
200ml natural yoghurt
2 tsp paprika

Preheat your oven to 200°C. Put the squash, sweet potato, pepper and onion onto a large baking tray lined with non-stick baking paper. Drizzle them with the oil and make sure they are all covered then season with salt and pepper. Roast the vegetables for 15 minutes then take the tray out of the oven, turn the vegetables over, and roast for a further 15 minutes.

Put the spinach, roasted vegetables and chickpeas into a large salad bowl and gently toss them together. Mix the yoghurt and paprika together. Put the salad on to the serving plates then drizzle some dressing over the top. 


Asparagus and Quinoa Salad

500ml vegetable stock 
200g quinoa, rinsed and drained 
500g asparagus, woody ends snapped off then cut into 1 inch lengths
1 large pepper, deseeded and roughly chopped 
150g crumbled feta 
2 red onions, peeled and thinly sliced 
1 handful chopped fresh flat-leaf parsley 


Dressing:
2 Tblsp fresh lemon juice 
2 tsp honey or sugar
2 tsp olive oil 
1 tsp paprika 
2 large handfuls of spinach

Put the stock and quinoa into a saucepan over a medium heat. Bring to the boil then reduce the heat to low. Cover and simmer for 10-15 minutes or until the liquid has been absorbed. Transfer to a large bowl and leave to cool.

Lightly cook the asparagus in boiling water or in the microwave until tender-crisp. Add the asparagus, pepper, feta, onion, parsley and rocket to the quinoa.

Put the dressing ingredients into a screw top jar. Shake to combine then pour over the salad. Toss everything together then serve.


Fruity Rice Salad

1 cup long-grain rice (white or brown) 
4 Tblsp olive oil 
2 Tblsp cider vinegar 
1 large lettuce 
3 large eating apples, cored and roughly chopped 
3 celery stalks, trimmed and thinly sliced 
large handful or two of raisins or sultanas

Cook the rice in a saucepan of boiling water, following packet instructions. Drain and then leave to cool. 

Put the oil and vinegar into a screw-top jar. Season with salt and pepper, put on the lid, then shake to combine. 

Roughly chop the lettuce and put in a large bowl Add the apple, celery and sultanas. Pour over the dressing, toss to combine, then serve.


Potato Salad

700g small new potatoes, unpeeled
2 hard-boiled eggs, quartered
125ml mayonnaise 
1 Tblsp cider vinegar 
3 spring onions, thinly sliced

Cook the potatoes in a large saucepan of boiling, salted water for until tender. Drain then put in a large salad bowl and leave too cool.

Mix the mayonnaise and vinegar together in a bowl. Add to the potatoes and toss to cover the potatoes in the dressing. Sprinkle over the spring onion and hard-boiled eggs. Serve.
Don't forget to check out all the other Meal Plans in the linky on 
At Home With Mrs M